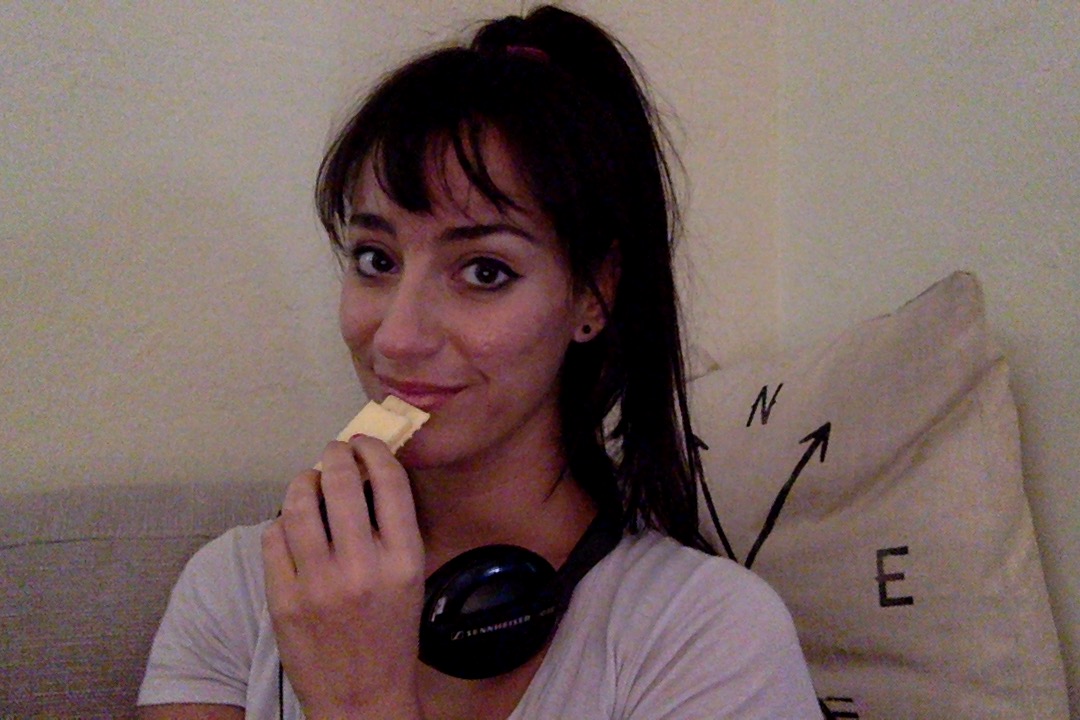
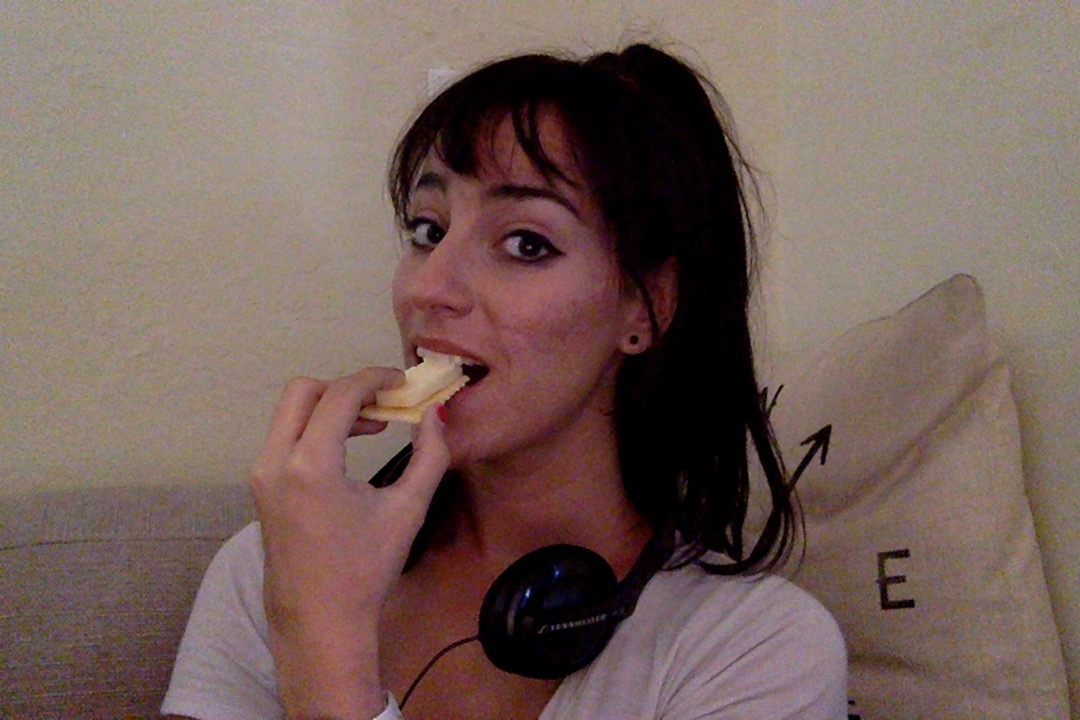
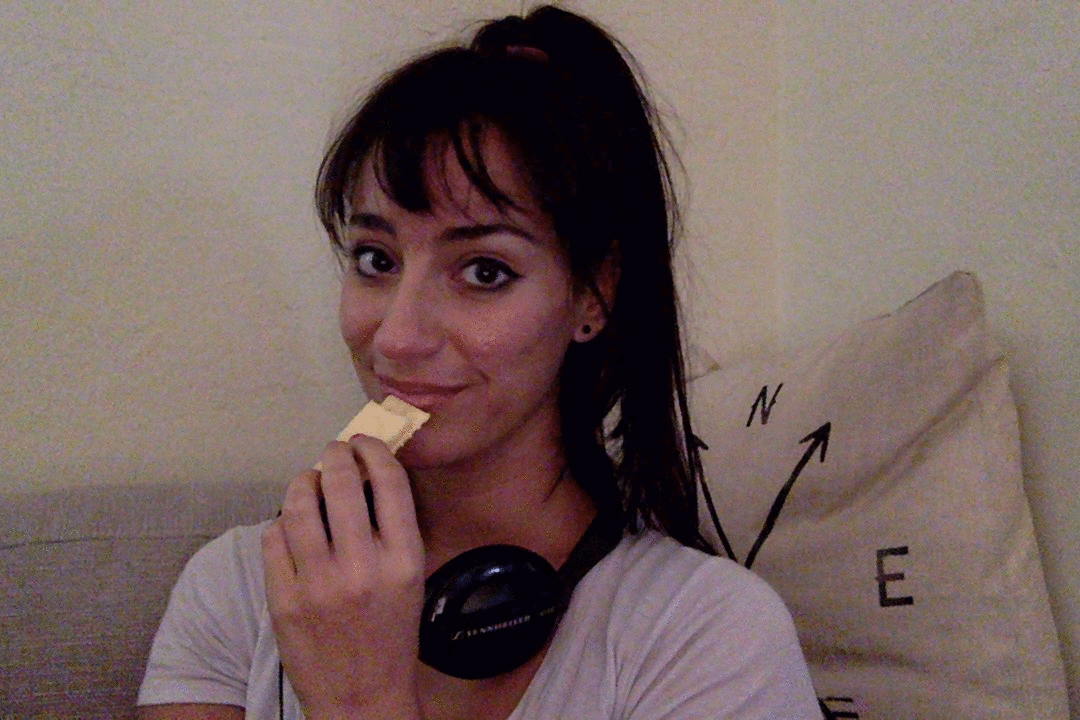
In this brief tutorial I’ll be teaching you how to make a service on macOS (or OS X) that allows you to quickly select multiple images and make them into a GIF file with a single click. There are many ways to generate your own animated GIFs, but I personally prefer to use a shell script and create my own reusable service instead of, for instance, using a web-based service like Giphy (of course, nothing wrong with that either) where you have to upload photos to a remote server. For my own personal amusement I’ll be using the following photos I randomly snapped of myself eating cheese and crackers:


Okay, let’s get this party started.
1. Install or setup Homebrew #
What is Homebrew and why do I need it?
Homebrew is a convenient (and arguably the best) package manager for OS X or macOS, that eases the pain from version management of applications and libraries. If it comes down to you having to choose between a Homebrew formula or a DMG (disk image) file to install something, definitely stick with Homebrew for your own future sanity. One of the biggest advantages of using Homebrew is that you don’t have to be an administrator to use it. It’s very easy to use and, by default, it attempts to use existing libraries that come built within the operating system first (usually, anyway). Of course, this behavior can be overwritten, but that’s a topic for another day.
If you normally use MacPorts, Fink, or are just compiling things manually, feel free to use that instead.
So, if you don’t already have Homebrew installed, let’s do that first. Open up Terminal by going to Applications > Utilities > Terminal.app. Execute the following command to get Homebrew installed:
ruby -e "$(curl -fsSL https://raw.githubusercontent.com/Homebrew/install/master/install)"If your system is ready to brew, continue to step #2.
2. Install Imagemagick #
What is Imagemagick?
Imagemagick is a very powerful tool for working with images, but it also comes with a convenient tool called convert. That is what we need in order to create the GIF service:
brew install imagemagick3. Create Automator Script #
Open up Automator by going to Applications > Automator.app. If a window pops up asking you to select a file, just press “Done”. Then go to the top menu bar where it reads File and click on “New”. Then select “Service” and press the “Choose” button on the bottom right-hand corner.
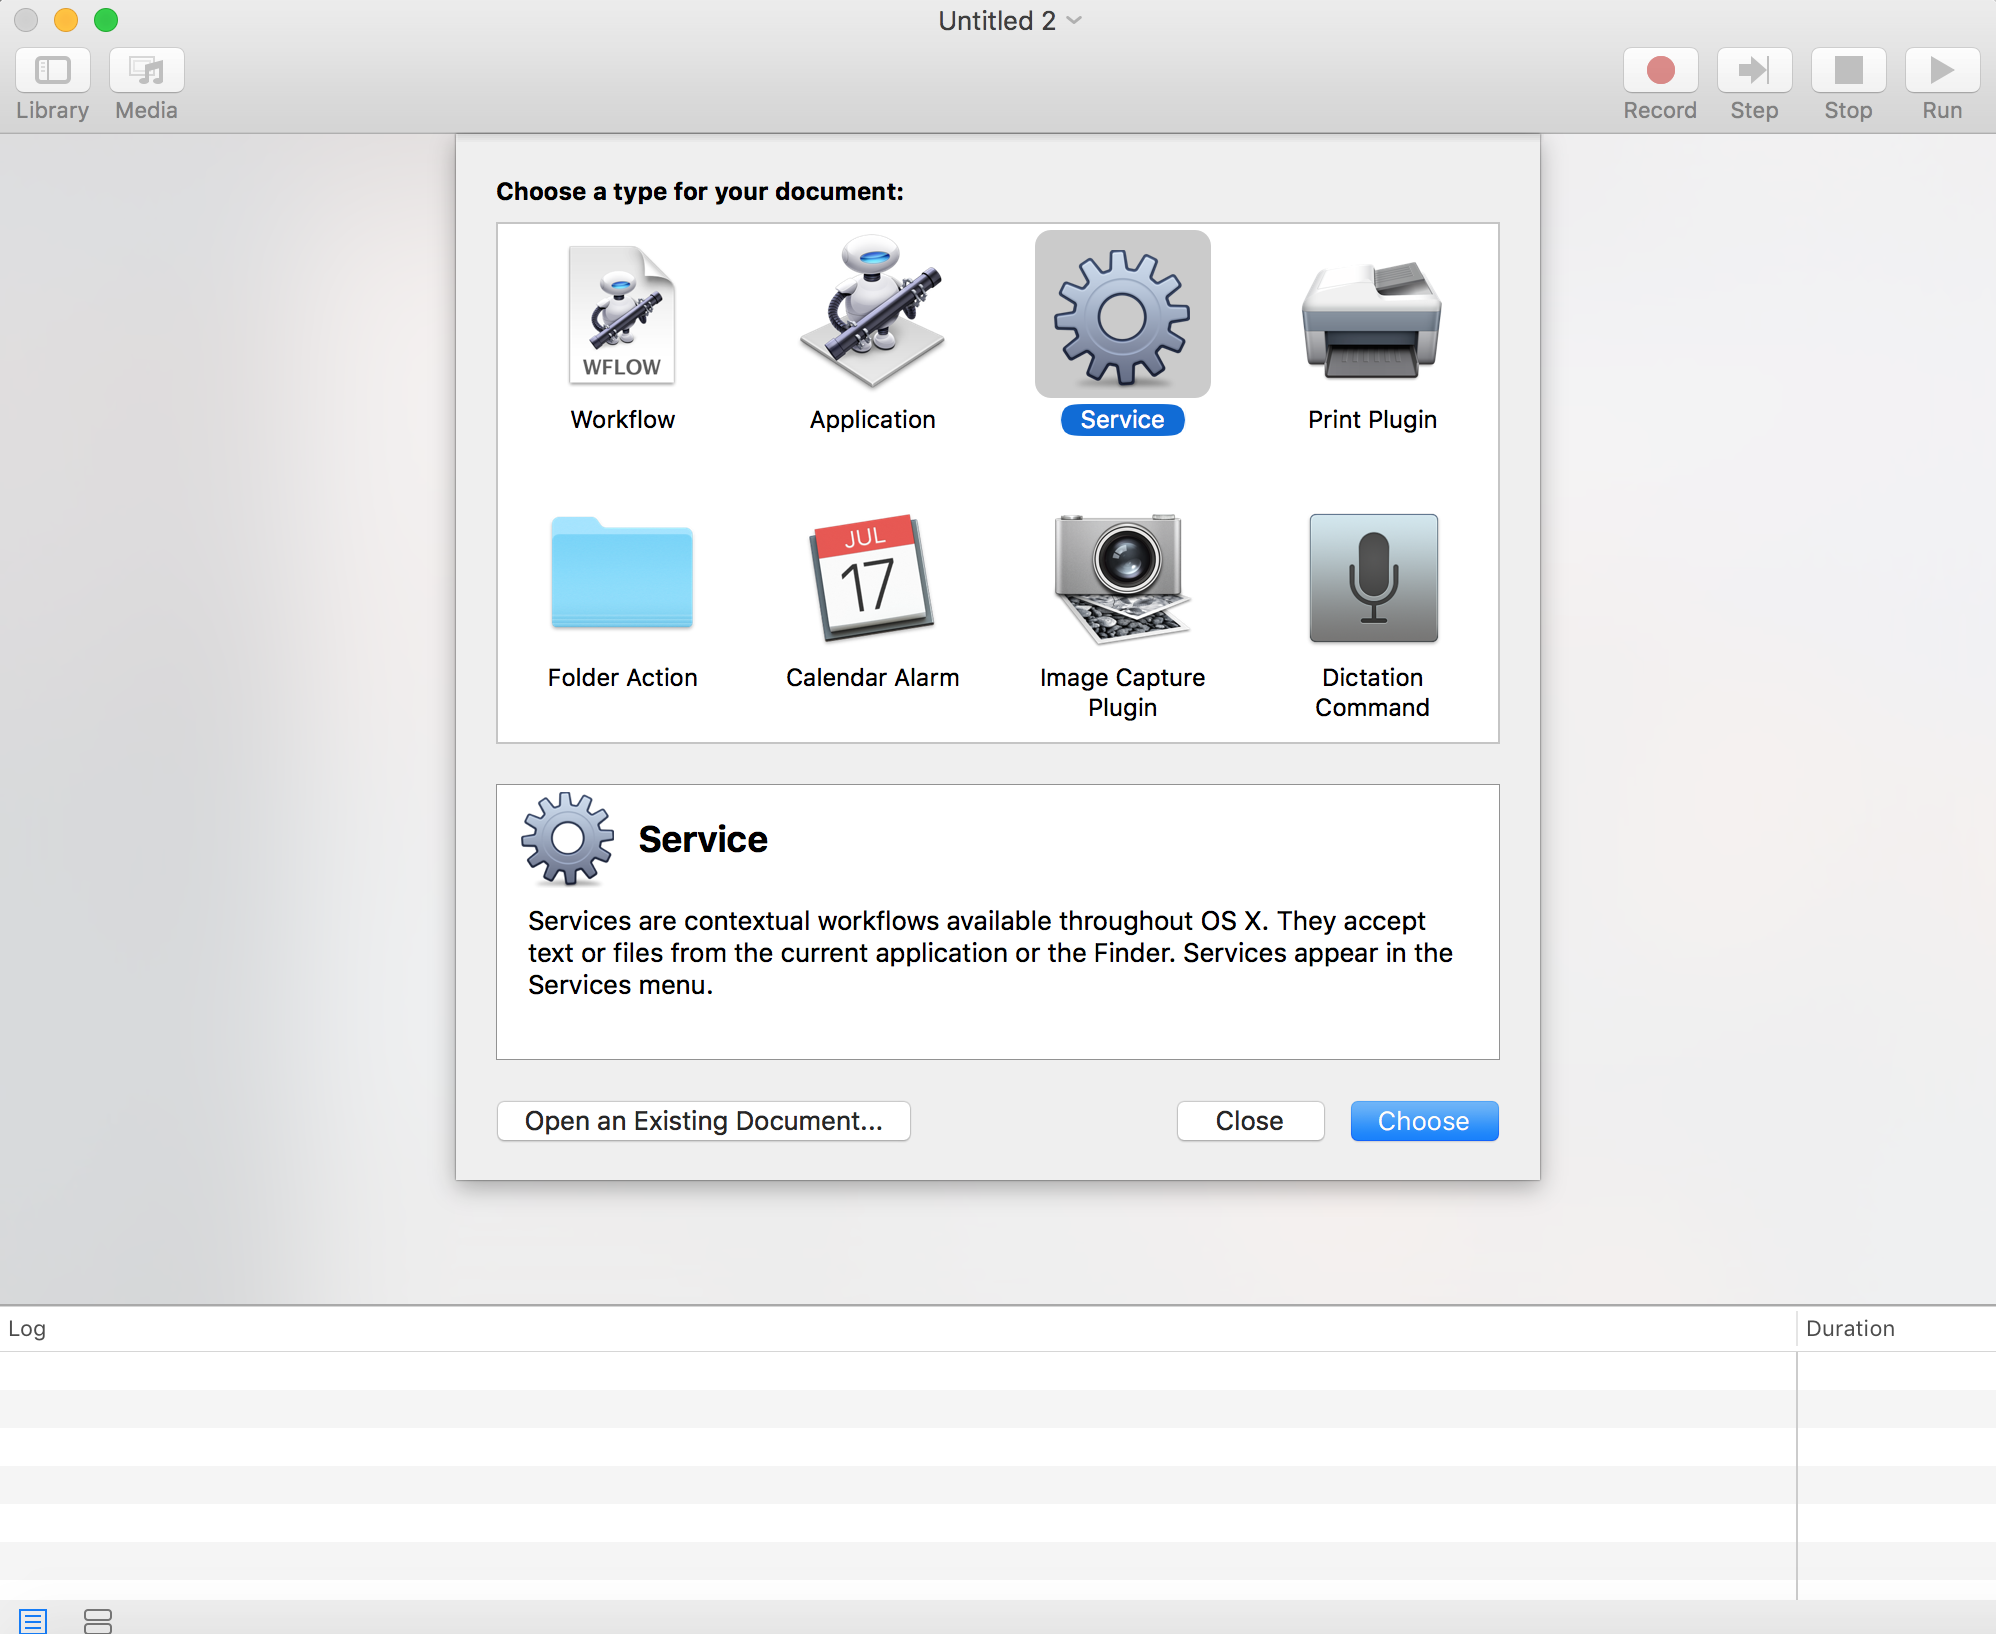
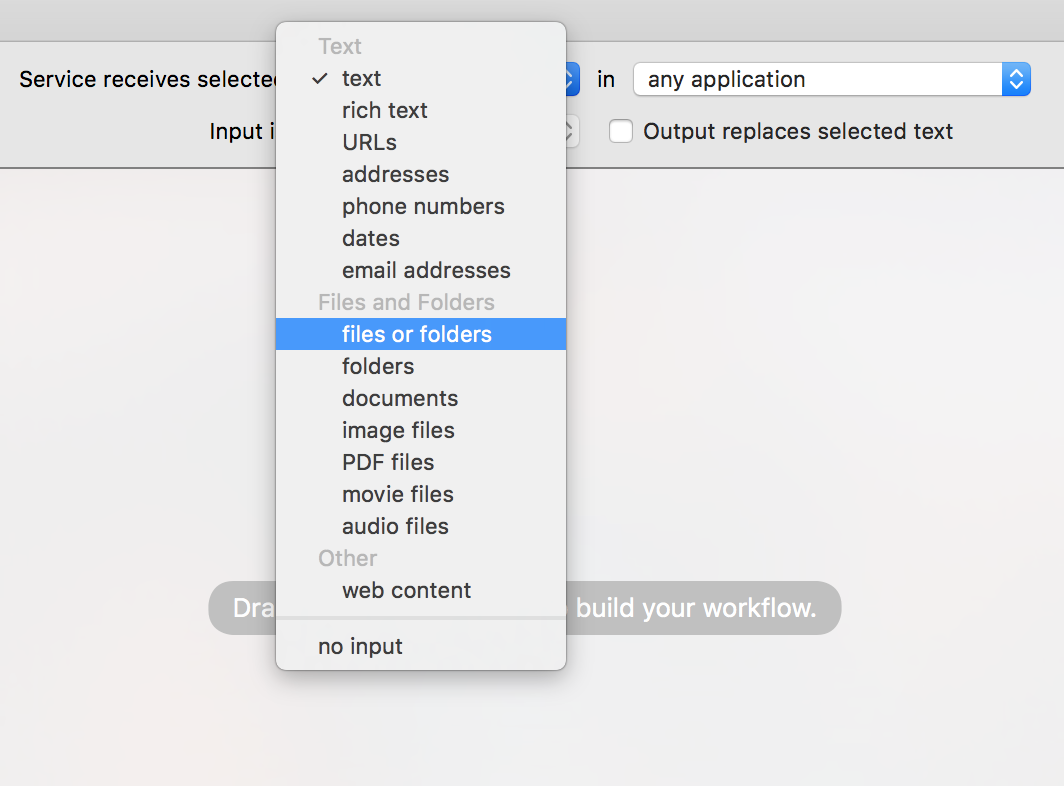
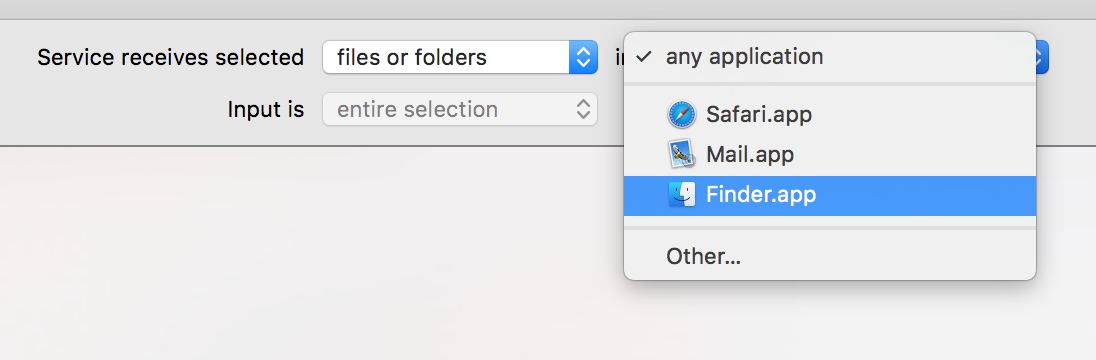
A new dialog appears that reads “Service receives selected {text} in {any application}.” where {text} and {any application} are dropdown menus. In the {text} dropdown, select “files or folders“, and in the {any application} dropdown select “Finder.app“.
Next, on the left hand side there is a really long menu of Actions available in the Library. Scroll down to, or search for, “Run Shell Script“. Drag it and drop it into the right pane.
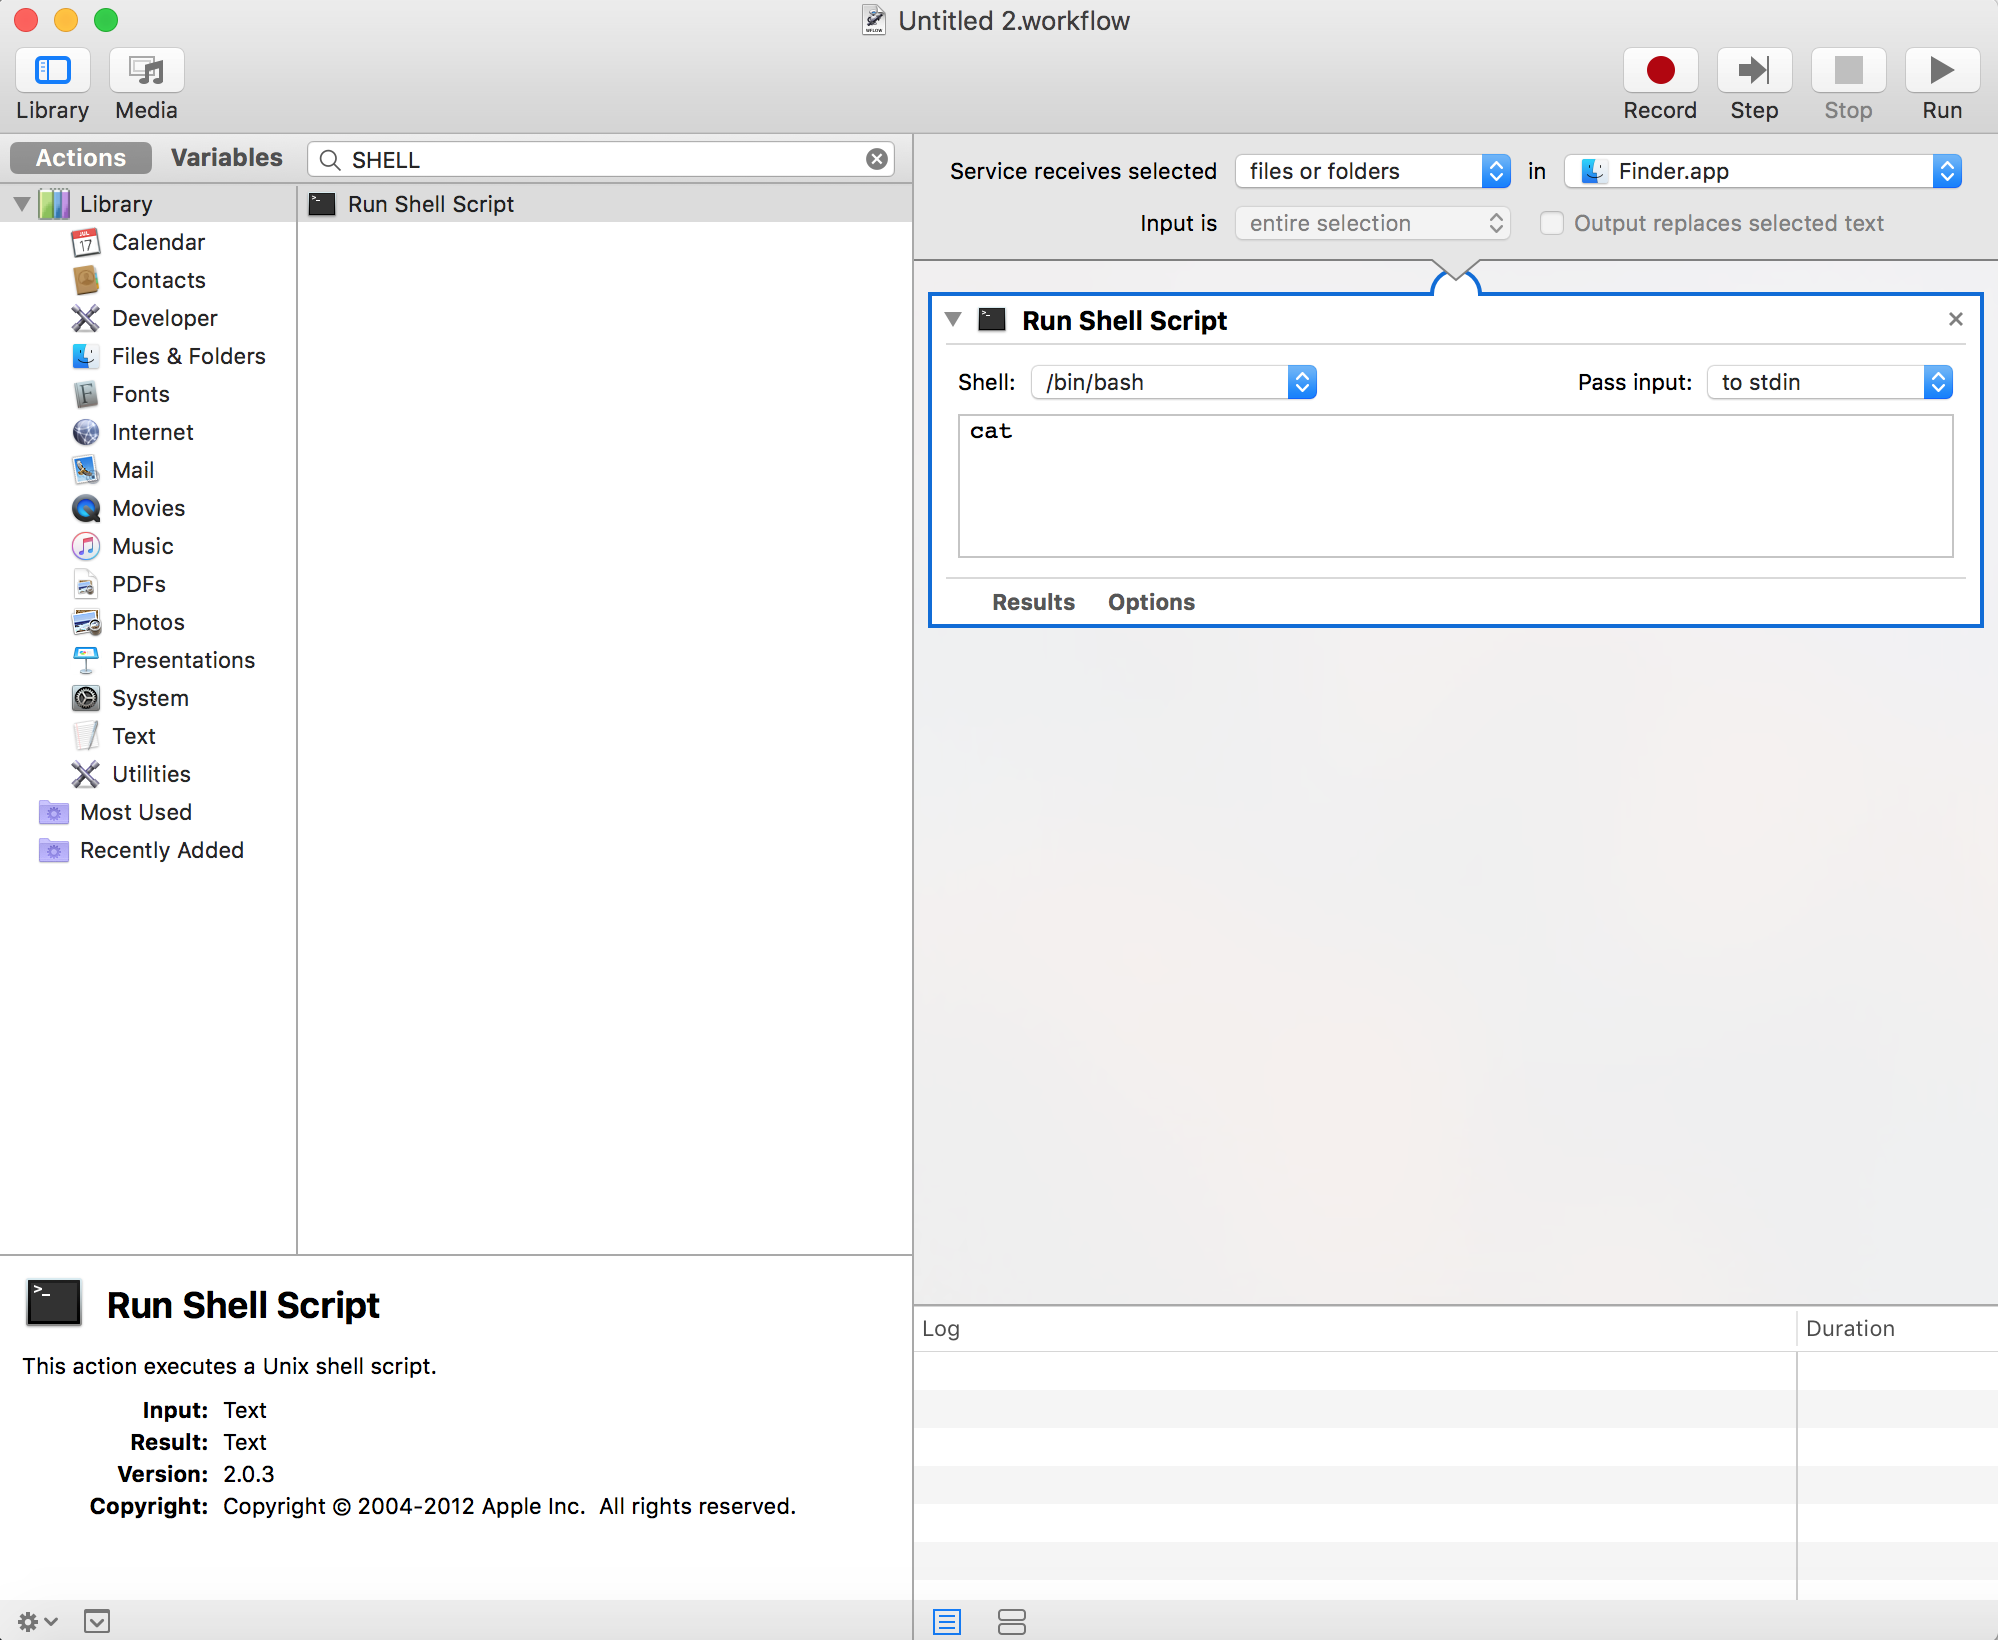
Bam! A new huge text area has just appeared in the right pane. If at first you don’t see a list of Actions to select from, toggle the Library button on the top left hand corner to make it appear.
You should now see a “pass input” option that defaults to {to stdin}. Select the {to stdin} dropdown menu and instead choose “as arguments“.
Copy and paste the following command in the text area:
/usr/local/bin/convert -delay 35 -loop 0 "$@" ~/Desktop/animated.gif
The -delay flag simply denotes how long each image in the series is displayed for, in milliseconds. I like 30-35, but sometimes it makes sense to go as low as 20. Totally up to you! Feel free to change the output path of the file from ~/Desktop/animated.gif to whatever you like. Please note that if you make more than one gif, it will automatically override the file that is there unless you rename it to something other than animated.gif.
Once you’re happy with it, go to File > Save and name this workflow “Make Animated Gif”.
4. $$Profit!! #
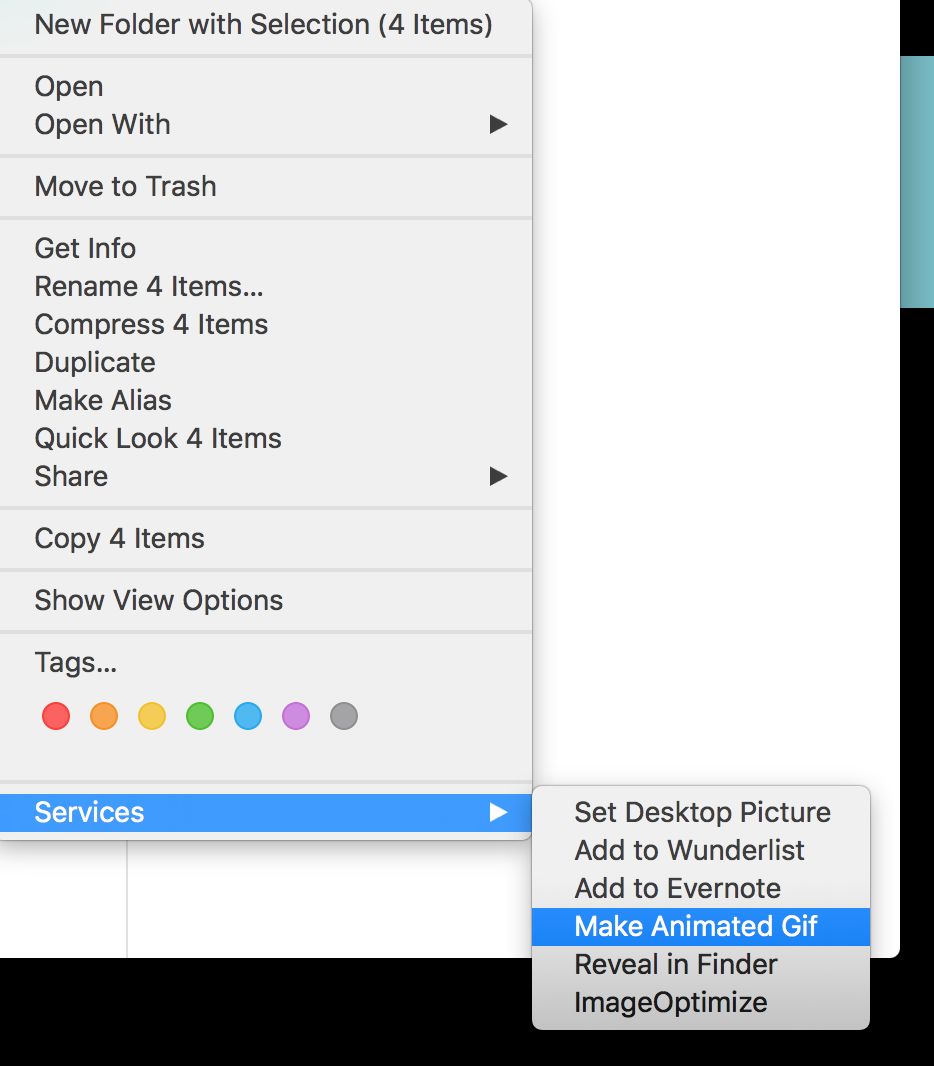
Grab your cheese, grab your crackers. Snap a few photos with Facetime, or just test with whatever you have. Command + click all of the photos you want as part of your GIF, right click and go to Services > Make Animated Gif.
Here is the final result:
This post is based on Jacob Samela’s post here. The script presented there works fine, but evidently duplicates the photos included in the GIF, which resulted in a much larger GIF file.